.png?width=150&height=81&name=Houghton%20Contracting%20Logotype%20New%20Logo%20(1).png)
11 Min Read
Remodeling a bathroom yourself is a big project, but with the right planning and know-how, New Jersey homeowners can achieve a beautiful result.
This step-by-step guide walks you through a full DIY bathroom remodel, from initial planning and demolition to plumbing, tiling, and finishing touches, with safety tips, tool recommendations, and guidance on NJ permit requirements.
Whether you're in Mercer County (Hamilton Township and beyond) or elsewhere in the Garden State, follow these steps to transform your bathroom while staying safe and code-compliant.
Table of Contents
- Key Takeaways, How to Remodel a Bathroom Yourself (DIY Guide for NJ Homeowners)
- Quick DIY Bathroom Remodel Tips
- Step 1: Plan and Prep (Design, Budget, Permits)
- Step 2: Demolition, Safely Removing the Old Bathroom
- Step 3: Rough-In Work (Plumbing and Electrical)
- Step 4: Walls and Floors, Drywall, Backer Board, and Tiling
- Step 5: Install Fixtures and Finishing Touches
- Safety Tips and Final Advice
- FAQ
Key Takeaways, How to Remodel a Bathroom Yourself (DIY Guide for NJ Homeowners)
- Plan Before You Swing the Hammer, Create a clear design, set a realistic budget, measure your space, and gather all tools before starting. Check NJ permit requirements, especially for plumbing, electrical, or layout changes.
- Safety Is Non-Negotiable, Shut off water and power before demolition. Wear gloves, goggles, dust masks, and protective clothing. Use lead-safe practices in older homes and handle debris promptly to avoid hazards.
- Follow Proper Sequence, Start with demolition, then tackle plumbing and electrical rough-ins before installing walls, floors, and finishes. This prevents rework and ensures compliance with NJ building codes.
- Prep Surfaces for Long-Lasting Results, Use moisture-resistant drywall and cement backer board in wet areas. Waterproof shower/tub surrounds before tiling to prevent future leaks. Ensure subfloor is sturdy to avoid cracked tiles.
- Install Fixtures Carefully, Position and secure vanities, toilets, and faucets correctly using plumber's tape and proper seals. Ensure GFCI outlets are installed for safety and test all systems for leaks and function before finishing.
- Don't Skip the Final Inspection, If permits were pulled, get your work inspected to ensure it's code-compliant and safe. Passing inspection gives peace of mind and protects your home's value.
- Patience Pays Off, A DIY bathroom remodel can take weeks, but proper planning, safe practices, and attention to detail will reward you with a beautiful, functional space you built yourself.
Quick DIY Bathroom Remodel Tips
- Plan design, budget, and tools before starting.
- Check NJ permit rules for plumbing/electrical changes.
- Shut off water & power; wear gloves, goggles, mask.
- Demo first, then rough-in plumbing/electrical.
- Use moisture-resistant drywall & waterproof shower walls.
- Ensure subfloor is sturdy before tiling.
- Install fixtures with proper seals & test for leaks.
- Get final inspection for safety & code compliance.
Step 1: Plan and Prep (Design, Budget, Permits)
- Design and Budget: Start by sketching out your dream bathroom layout and features. Measure your space and decide if you'll keep the current layout or relocate fixtures (toilet, shower, sink). Changing the layout is more complex since it involves moving plumbing and electrical lines. Set a realistic budget for materials (tiles, fixtures, vanity, etc.) and a timeline. Planning also means assembling the right tools, for example, you'll likely need a tape measure, pry bar, hammer, screwdrivers, adjustable wrench, power drill, and specialized tools if tiling (tile cutter, notched trowel, grout float), plus safety gear like gloves and goggles.
- Permits and Codes: Before any work, check your local building requirements. In New Jersey, most remodels beyond cosmetic changes do require permits. The NJ Uniform Construction Code (UCC) is enforced statewide, so even in Mercer County or Hamilton Township you must follow it. Generally, any plumbing modifications, new wiring, or structural changes will need permits.
- Prepare the Area: Once permits are in hand and your plan is set, prepare the room. Clear out all toiletries, decorations, and removable items. It's wise to set up a temporary wash station elsewhere in your home, since the bathroom will be out of service during the remodel. Gather materials and tools so you have everything on site. Protect other areas of the house by covering floors along the route to the bathroom (to catch dust and debris) and set up a ventilated area if you'll cut tile or wood indoors. Shut off the water supply to the bathroom (usually via the toilet and sink shutoff valves, and the main water valve if needed) and turn off power to any bathroom circuits at the breaker panel before you begin demolition, safety first!
Step 2: Demolition, Safely Removing the Old Bathroom
- Demo is one of the most physically demanding, and potentially fun, parts of a remodel. This is where you tear out the old fixtures and finishes to make way for the new. Safety is paramount during demolition. Wear durable work gloves and safety glasses or goggles to protect against flying debris and sharp edges. A dust mask or respirator is essential when tearing out old drywall or tile to avoid inhaling dust (especially if your home is older and could have lead paint or other hazardous dust, assume any pre-1978 paint is lead-based and use lead-safe work practices with proper containment and PPE). It's also smart to wear long sleeves and durable pants to shield your skin from sharp tiles or nails.
- Removing Fixtures: Start by removing fixtures and furnishings. Take out the vanity, sink, and toilet first. For the toilet, drain it by turning off the water and flushing, then disconnect the water line and unbolt it from the floor (have a bucket or old towels handy for any remaining water). Remove the sink by turning off and disconnecting water supply lines and the drain trap, then unmounting the faucet and sink basin. If you have a heavy cast iron tub and plan to remove it, get a helper, tubs are very heavy and awkward. In some cases, it may need to be cut into pieces with a reciprocating saw for removal (wear hearing protection and eye protection for this task).
- Tearing Out Surfaces: Next, remove wall finishes (like tiles or old drywall) and flooring. Use a pry bar, hammer, and chisel to chip away tiles and loosen drywall. A flat pry bar is handy for prying off tile backer boards or wood paneling. When pulling out drywall or wall tiles, be careful of electrical wires and plumbing inside the walls. Go slowly near pipes or outlets, you don't want to accidentally break a pipe or cut through wiring. If you encounter moldy drywall or insulation (common behind old shower walls), wear a respirator and dispose of it in heavy-duty trash bags. For flooring, depending on the material, you might use a floor scraper or pry bar to remove old tile, vinyl, or wood. Remove any old screws or nails sticking out of studs or the subfloor after demo to leave a clean slate.
Have a plan for debris disposal, bathroom demolition generates a lot of waste (old tiles, broken drywall, fixtures). Renting a small dumpster or using a truck to haul debris to an appropriate landfill or recycling center is often necessary. Keep the work area as tidy as possible; throw away debris promptly so it's not underfoot. This not only makes working easier but also safer (less risk of tripping or cutting yourself on hidden shards).
Step 3: Rough-In Work (Plumbing and Electrical)
- With the space gutted down to the studs and subfloor, it's time for "rough-in" work, installing or updating the infrastructure behind the walls. For a DIYer, this phase is critical and must be done up to code before you close the walls. If your remodel keeps the same fixture layout, you may just need to repair or update existing plumbing and wiring. If you're moving fixtures (say, shifting a toilet or adding a new light), you'll be reconfiguring pipes and electrical cables accordingly.
- Plumbing: Plan out any new plumbing runs. This can include running new water supply lines (for a relocated sink or shower) or adjusting drain lines. In New Jersey, any new plumbing work must meet code, use the proper diameter pipes, slope drain lines correctly (typically 1/4″ per foot for horizontal drains), and include P-traps and vent connections as required. If you have old galvanized or copper pipes, this might be an opportunity to update to modern PEX or PVC, but ensure compatibility and follow plumbing codes.
Tip: Turn off the main water supply before cutting into existing pipes, and keep a bucket handy to catch residual water. When cutting pipes, measure twice and cut once; dry-fit everything before gluing PVC or soldering copper. Many DIYers now opt for push-fit connectors or PEX with crimp fittings for easier installation. After installing new supply lines or drains, check for leaks by temporarily turning the water back on and inspecting all joints. Better to fix leaks now than after walls are closed up.
- Electrical: If you're adding or moving outlets, lights, or switches, do this during the rough-in stage as well. All bathroom outlets must be GFCI-protected by code (ground-fault circuit interrupters), so plan to install GFCI outlets or have the circuit protected at the breaker. It's safest to run new wiring from the electrical panel or existing circuits with the power turned off. Ensure any new light fixture boxes are rated for the weight if you're adding a heavy light or fan. If installing an exhaust fan (highly recommended for ventilation if not already present), you'll need to vent it to the outside (through an exterior wall or roof) and wire it to a switch. Secure cables with proper staples and leave at least 6 inches of wire extending from electrical boxes for connections (per code).
Note: If you are not comfortable with electrical work, consider hiring a licensed electrician for this part, electricity can be very dangerous. New Jersey does allow homeowners to do their own electrical in a single-family home they occupy (with permits and inspection), but you must follow all safety codes.
Step 4: Walls and Floors, Drywall, Backer Board, and Tiling
- Once the guts of the bathroom (pipes and wires) are in place and approved, you can start closing up and making it look like a room again. This phase involves installing wall materials, laying the floor, and applying tile or other finishes.
- Drywall and Backer Board: Begin by repairing or installing wall material. For dry areas of the bathroom (walls outside the tub/shower area), use moisture-resistant drywall (often green or purple board) especially if the bathroom is prone to humidity. For the shower or tub surround walls, do not use regular drywall, use cement backer board or a fiber-cement board designed for tile. Cement board is water-resistant and provides a solid base for tile. Cut your drywall/backer to size (a utility knife works for drywall; use a carbide blade or saw for cement board) and screw them to the wall studs. Fill seams with the appropriate tape (fiberglass mesh tape for cement board) and thinset mortar (for cement board seams) or joint compound (for drywall seams in dry areas). If using a prefabricated shower niche or bench, install it per manufacturer instructions at this stage.
Before tiling, waterproof the shower enclosure. Even cement board is not totally waterproof, so it's wise to apply a waterproofing membrane on shower walls (such as a roll-on liquid membrane or a bonded waterproof sheet membrane) to prevent any future moisture from seeping into walls. Also ensure any gaps around plumbing penetrations are sealed. This step is crucial for longevity, you want your new tiled shower to be leak-free for decades.
- Floor Prep: Check the subfloor for damage or flex. If you removed ceramic tile, the subfloor may have remnants of old thinset; scrape it clean. Replace any sections of subfloor that are rotten or weak. Bathrooms benefit from a sturdy subfloor, if tiles are planned, the floor shouldn't deflect under weight (too much flex can cause tiles to crack later). You might need to install an extra layer of plywood or a cement backer board on the floor as underlayment for tile. Cut the backer board to fit and thinset and screw it down according to instructions (leaving small gaps between sheets and taping those seams with thinset and mesh tape).
- Tiling: With walls prepped and floors solid, you can tile. Plan your tile layout before you start mixing mortar. It often looks best to center tiles or use a layout that avoids slivers of cut tile along edges. Begin with the shower walls or tub surround if you're doing those, then the floor, or vice versa, just be careful not to damage a newly tiled surface while working on another. Use a level and a chalk line to keep your tile rows straight. Apply thinset mortar with a notched trowel, combing it out in small sections at a time. Press tiles in place with spacers between them for even grout lines. Tile cutting will be necessary around edges, plumbing fixtures, and corners, a manual tile cutter or wet saw can be used depending on tile type (porcelain and stone often need a wet saw). Always wear safety glasses when cutting or nipping tiles.
Work patiently and check your alignment frequently. Once all tiles are set and the mortar has cured (usually 24-48 hours), remove spacers and grout the tiles. Use a rubber grout float to pack grout into the joints at a 45-degree angle. Wipe off excess grout with a damp sponge, rinsing it often, to leave a smooth finish. Allow the grout to cure, then buff off any haze from the tile surface with a soft cloth. Finally, apply silicone caulk in corners and around the tub or shower base (any change of plane) to seal those joints. Also caulk where the tile meets the vanity or other fixtures. Caulk is flexible and handles movement better than grout in those spots.
- Painting and Trim: If you have any untiled drywall areas, this is a good time to paint the walls and ceiling (it's easier before installing fixtures). Use a bathroom-rated paint (moisture-resistant and mildew-inhibiting). Primer any new drywall first. Two coats of a satin or semi-gloss finish are common for bathrooms due to better moisture resistance. Also install any trim or baseboards now. If you saved the old baseboards and they're in good shape, you can reuse them (cut or repaint as needed) or install new base molding for a fresh look. Use a paintable caulk along the top of baseboards for a neat finish against walls.
Step 5: Install Fixtures and Finishing Touches
With the heavy construction done, you're ready to bring in the new fixtures and put the finishing touches on your bathroom. It's like the home stretch of the project where everything comes together.
- Bathroom Fixtures: Install your new vanity or sink first, as it's easier to position without the toilet in the way. Secure the vanity to the wall studs per instructions and hook up the faucet and drain. Use plumber's tape on threaded water connections and don't overtighten to avoid cracks. Next, install the toilet. Place a new wax ring (or rubber gasket seal) on the floor flange, set the toilet bowl in place over the bolts, and press down evenly. Tighten the bolts snugly (not too hard, or you can crack the porcelain). Hook up the water supply to the tank, turn on the valve, and do a test flush for leaks. Install the toilet tank lid and seat as directed.
If you have a new tub or shower fixtures, install the showerhead, faucet, and handles now (most likely the valve was installed during rough-in, so now you're putting on the trim kit). Apply silicone caulk around the edges of any tub spout or trim plates if the manufacturer indicates, to prevent water intrusion behind walls. If you put in a glass shower door or enclosure, follow the installation instructions carefully, this often involves securing tracks or hinges to the tile walls with screws and caulk, so measure twice before drilling into that beautiful new tile. It's often a two-person job to hang a glass door, so get help to avoid accidents.
- Lighting and Ventilation: Mount any new light fixtures, such as vanity lights or ceiling lights, by connecting the wiring (ensure power is off while wiring, then test after installation). Also install the cover and grille of your exhaust fan if you added one. Good lighting and a working vent fan will make your new bathroom more comfortable and prevent moisture problems. Don't forget to install GFCI outlet covers or the new GFCI outlets if you haven't already, they are required near sinks for safety.
- Finishing Details: Now add the accessories that complete the bathroom. Install towel bars, robe hooks, toilet paper holders, and the mirror or medicine cabinet. It's a good idea to anchor these into studs or use proper wall anchors because they'll get yanked on over time. Add any shelving or cabinets you planned. Finally, apply a bead of caulk along the top edge of the sink where it meets the wall, and along the edges of the vanity or tub if they meet the walls, this seals out splashed water.
With everything in place, turn on the main water supply and electricity (if you haven't already), and do a thorough test of all systems. Run the shower and sink to check for leaks in drains and supply lines. Test that the GFCI outlets trip and reset correctly. Turn on the exhaust fan to verify it's venting properly. Also, ensure hot and cold water are correctly oriented on your fixtures (hot on the left, cold on the right).
Lastly, if you obtained permits, you will need a final inspection from the local code official. They will check that all the work (plumbing, electrical, building) was done to code and safely before signing off. Once you pass the final inspection, congratulations, you have a fully legal and safe new bathroom.
Safety Tips and Final Advice
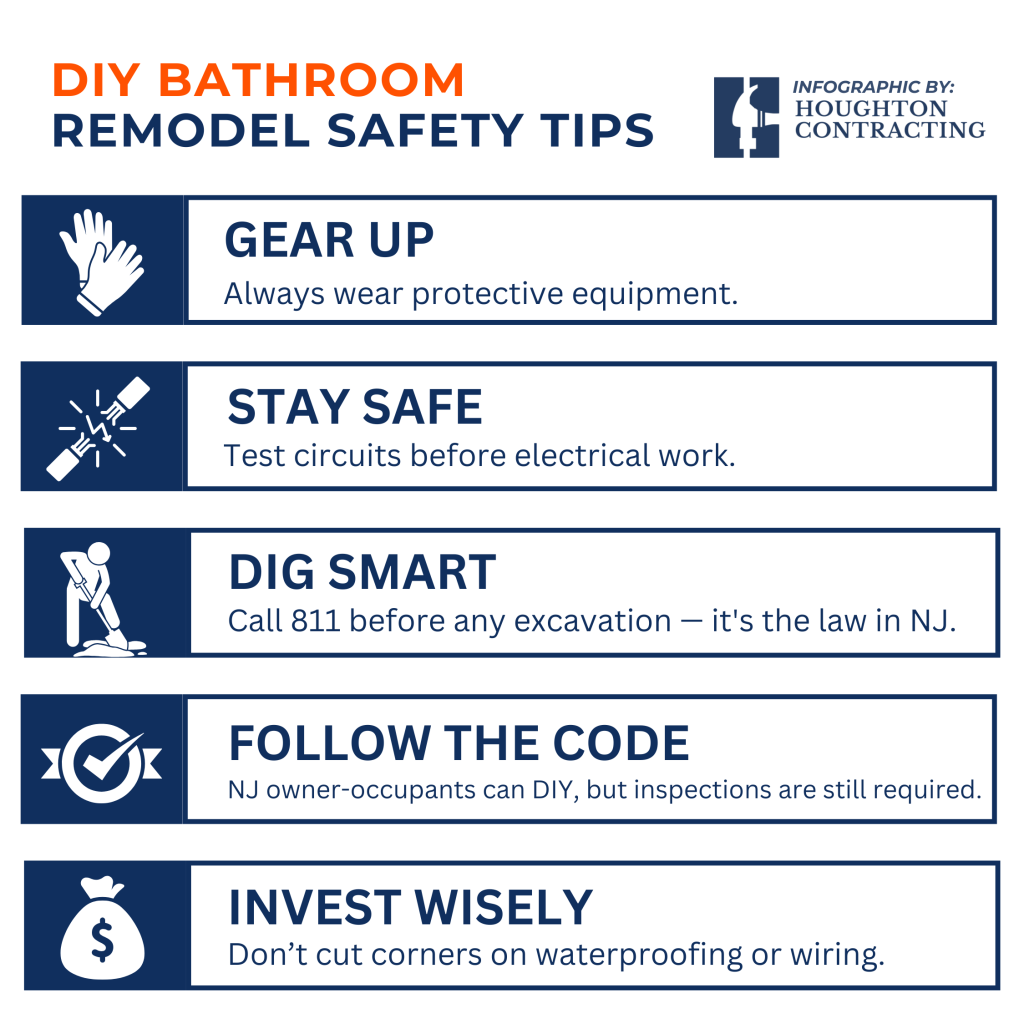
Enjoy the process and the result. A bathroom remodel is disruptive and can take several weeks, but once complete, you'll have the satisfaction of knowing you did it yourself. Not only have you likely increased your home's value and functionality, you've also gained new skills. Take a well-deserved soak in your new tub or a hot shower in your new tiled stall, you've earned it!
Ready to bring your DIY bathroom vision to life with professional guidance? Request your free consultation now and discover how easy and affordable your dream bathroom can be!
FAQ
1. Do I need a permit to remodel my bathroom in New Jersey?
Yes. In NJ, permits are required for most bathroom remodels involving plumbing, electrical, or structural work. Cosmetic updates (like painting or replacing a faucet) may not require one, but moving fixtures, adding outlets, or changing walls will. Always check with your local building department before starting.
2. How much does it cost to remodel a bathroom yourself?
A DIY bathroom remodel in New Jersey can range from $3,000–$10,000 depending on the size, materials, and whether you change the layout. Doing the work yourself saves on labor, but you'll still need to budget for quality fixtures, tile, and permits.
3. How long does a DIY bathroom remodel take?
Most DIY bathroom remodels take 3–6 weeks from start to finish, depending on the complexity and your availability. Larger projects or layout changes involving plumbing/electrical work can take longer, especially if inspections are required.
4. What tools do I need for a bathroom remodel?
Basic tools include a tape measure, pry bar, hammer, screwdrivers, adjustable wrench, power drill, and safety gear. For tiling, you'll need a tile cutter, notched trowel, and grout float. Specialized tools like a wet saw may be necessary for certain tiles.
5. Can I do the plumbing and electrical myself in New Jersey?
Yes, NJ allows homeowners to do their own plumbing and electrical work in single-family homes they occupy, provided you pull the proper permits and pass inspections. If you're not confident with these tasks, hiring licensed professionals is recommended for safety.